Upload SSL Certificate
If the WAF is the first point of termination for public SSL certificates, then you will need to upload valid public SSL certificates to all websites configured for HTTPS; otherwise, users will see SSL certificate errors in their browsers. You should upload public SSL certificates to the WAF in the following cases:
- Physical or virtual WAFs without a load balancer in front of the WAF, where the load balancer is presenting the public SSL certificates
- In AWS, if you are using an NLB with a TCP listener in front of the WAF
- In Azure, if you are using either the basic or standard Azure load balancer in front of the WAF
If there is a load balancer in front of the WAF that will present SSL certificates to the browser, then you do not need to load public SSL certificates on the WAF (such as an AWS ALB or NLB with TLS listener, Azure App Gateway, or an on-prem layer 7 load balancer configured to present public SSL certificates). The WAF automatically generates a self-signed SSL certificate when you create a website with an HTTPS listener. The WAF will use the self-signed certificate as the encryption key between the load balancer and the WAF for HTTPS traffic.
Note that placing public SSL certificates on the WAF does not mean HTTPS stops at the WAF. Loading the SSL certificate on the WAF simply enables the WAF to present the valid SSL certificate to the browser or client. The WAF can still be configured to encrypt traffic (HTTPS) to the backend web server (Real server). For best practice, once the WAF inspects the traffic, we recommend configuring the WAF to re-encrypt traffic to the backend web server (Real server).
To upload an SSL certificate to one of the websites:
- In the Alert Logic console, click navigation menu (
 ) > Configure > WAF, and then click the Appliances tab.
 - In the item row of your appliance, click the appliance name.
- In the Managed WAFconsole, click Websites, and click the desired website.
- On the Website page, click Virtual host.
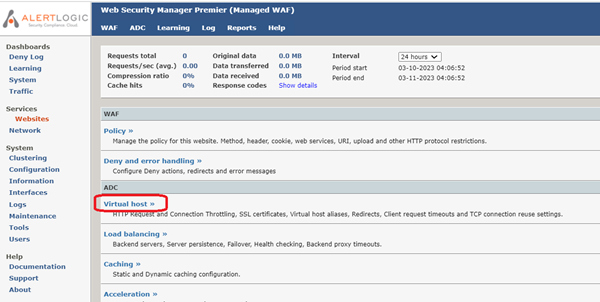
- On the Virtual host page, click Manage certificates.

- Select either Import SSL certificate (PEM format) or Import SSL certificate (PKCS12 format), depending on the format of you SSL certificate.
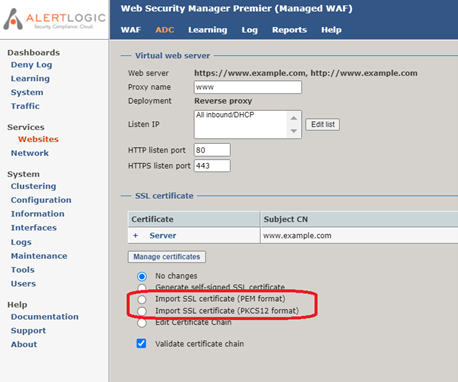
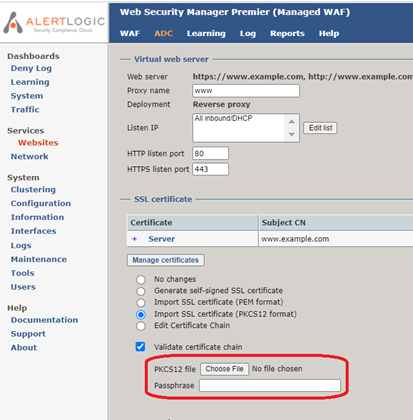
- If you have a single .pfx file, then select Import SSL certificate (PKCS12 format). Click Choose File and navigate to the .pfx file. If there is a passphrase associated with the SSL certificate key, enter the passphrase in the textbox.
- If you have two or three text files that end with .pem, .cer, or .key, then select Import SSL certificate (PEM format). If there is a single text file with multiple sections, the text file may combine the public certificate, private key, and certificate authority chain into a single file. Open the SSL certificate files in a text editor, then cut and paste the contents into the appropriate text box.
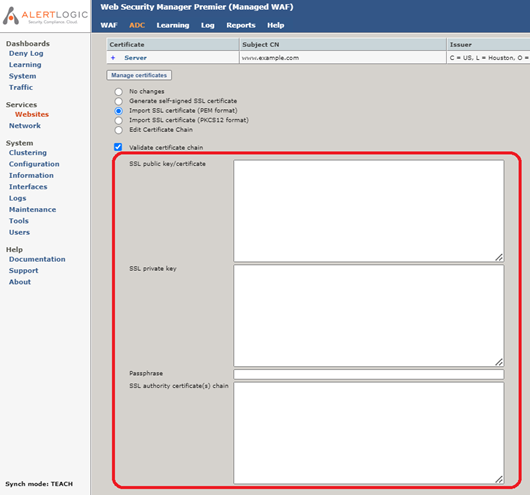
- SSL private key: The contents of the .key file. An SSL private key always begins with “-----BEGIN RSA PRIVATE KEY-----”.
- SSL public key/certificate: The contents of the .pem or .cer file. An SSL public key/certificate always begins with “-----BEGIN CERTIFICATE-----”. If there are multiple sections in a single file, typically the first section is the SSL public key/certificate.
- SSL authority certificate(s) chain: The contents of CA Cert.txt or ca.cer. An SSL authority certificate(s) chain always begins with “-----BEGIN CERTIFICATE-----”. If there are multiple sections in a single file containing both the SSL public key and the SSL authority certificate(s) chain, typically all sections other than the first section are the SSL authority certificate(s) chain. Note that the SSL authority certificate(s) chain itself may be made up of multiple sections.
- If you have a single .pfx file, then select Import SSL certificate (PKCS12 format). Click Choose File and navigate to the .pfx file. If there is a passphrase associated with the SSL certificate key, enter the passphrase in the textbox.
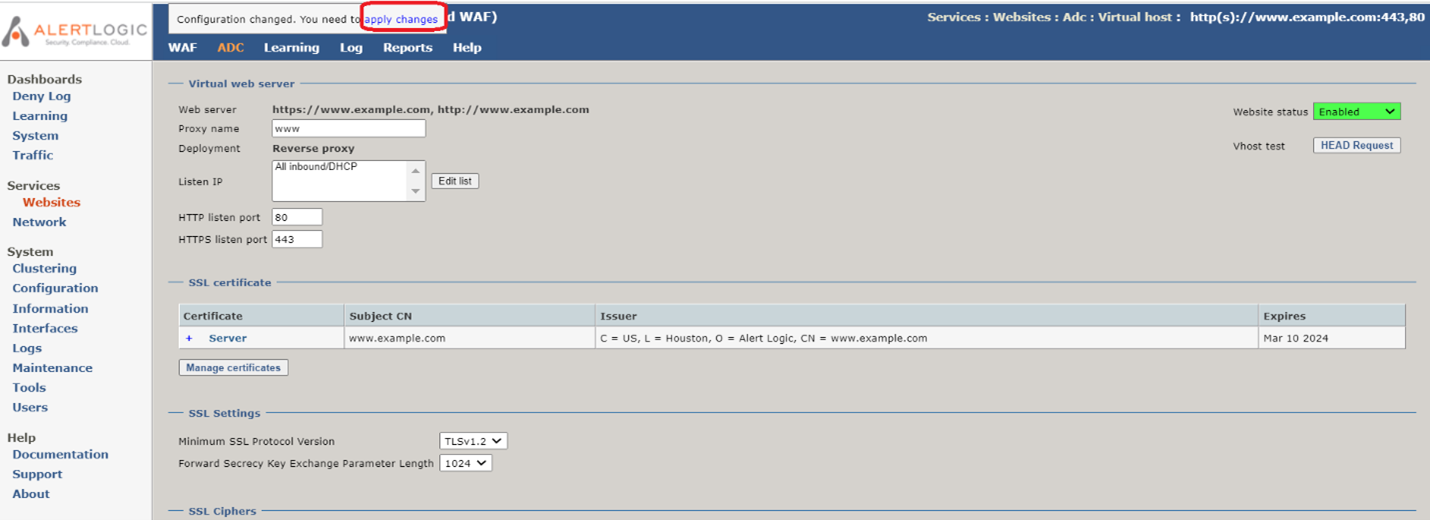
- Click Save settings on the lower right.
- To commit your changes, click apply changes at the top of the screen. When prompted “Are you sure you want to apply the changes to the running configuration?”, click OK.